LABOR DAY – PART 2
Picking up where we left off, I got the wet work done in the room, which is important to complete prior to installing a wood floor. For me, this meant all the patching, priming, and painting was done. From there, I brought in the Sierra’s Choice flooring. Installing a wood floor isn’t rocket science. But it is something that takes some patience. You want to make sure to look at each piece before nailing it in place, and take into consideration how it looks with the pieces around it. This is especially important in a smaller space where the floor is a real focal point of the room. In my installation, I intentionally used some flooring with un-square ends, and left an occasional gap between planks, as we’re after a “modern-cottage” sort of a look.

After stapling down a layer of 15# roofing felt to reduce squeaks, I got to work putting in the wood. I used a finish nailer with 2″ nails, as opposed to a floor nailer, because of the small space. Nails were shot in above the tongue at the proper angle every 6″ or so, with the ends of planks at the wall getting face nailed. Always, always, always, leave a 1/2″ – 3/4″ expansion gap around your room when putting in a floor. The baseboard and/or shoe moulding will cover it, and it will allow the floor to breathe without buckling.
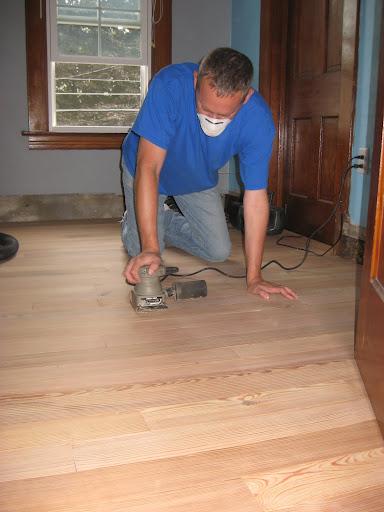
If you’d like more information on installation, drop me a line anytime. But getting on to the fun part, I started off the sanding with a light pass of 80 grit, which will take out scuffs, pillow most overwood, and open up the grain nicely. This was swept & vacuumed, and then gone over with a pass of 100 grit. You’ll notice I am using a simple palm sander for this work. Given the room size, there’s no reason to bring in the heavy equipment – if you don’t have a palm sander, pick one up, and you’ll then have a great little multi-tasker for future projects. Get the room swept & vacuumed again, and we’re ready to get into the magic – finishing the floor.
That's coming next – so keep in touch.
– Jered


