LABOR DAY, PART III

Back to the action!
Once the floor was sanded, vacuumed, and dust free, I checked over the floor to make sure no burrs or splinters were sticking up. While our goal was to have a floor that was “imperfect”, we certainly didn’t want slivers in our feet. I had installed a few boards that had “skip” in them. These can add some cool texture to an otherwise smooth floor, when combined with some occasional gaps, nail holes, minor cracks, etc. To keep the look of the saw marks, without the inherent fuzz & splinters, I dug in with a 100 grit sandpaper carefully working in between the saw marks to smooth them out just enough to be safe. A quick vacuuming, and its time to finish.
Some folks recommend paints specifically designed for flooring. If you’re painting concrete, or a super high-traffic area, I can see the advantage to that. But since is a small spare room / office, I used some leftover satin white paint I had from a prior project.
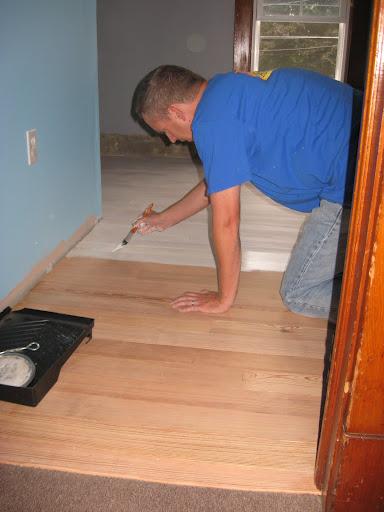
I didn’t want to have a pristine white floor – I wanted to let the grain show through. So I employed a technique from my hobby of model trains, called “dry-brushing”. Rather than loading up the brush with a large amount of paint, I used a much smaller amount, just enough to cover the first 1/2″ or so of the brush. Then, using a lighter and faster stroke than you would on a wall, applied the paint very thin on the wood. Yes, this takes some time to cover any substantial area, but you certainly don’t want too much paint on the floor.

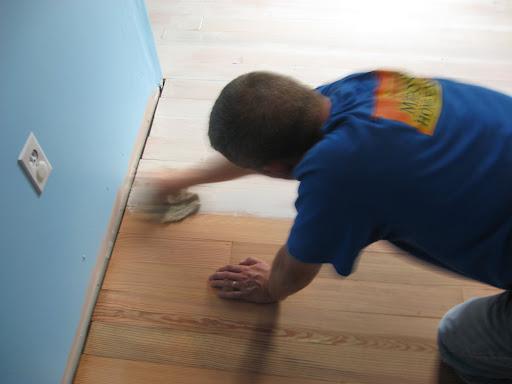
Work in small areas with a technique like this. The planks on our floor were 4″ wide, so I worked about 3 planks wide, by 4′ – 5′ deep at a time. Before the paint dried though ( and when put on this sparingly it dries FAST!), I used an old towel to scrub the paint – this blends the floor together, and takes out some of the variation as you work from section to section. All in all, the painting process for the whole room of about 90 sf of flooring took an hour. See? It really doesn’t take that long to get a really unique effect.
After the paint had dried overnight, I did a light sanding with 150 grit paper to smooth out any raised grain and bubbles in the paint. Finally,the last step was applying 2 coats of a clear finish. Again, because of the the low traffic, a basic satin finish water-based urethane was used. The label and info might advise against using this on a floor, but having done 3 other bedrooms in our home with this finish, I know it works fine. I wouldn’t put it in a heavy traffic area though; use a harder floor-specific finish there. Between coats, I sanded with the 150 grit, and then went to a 220. Since I was working this by hand and using very light pressure, the process didn’t take very long.
The end result is silky-smooth, looks amazing, and is a polar opposite of any other floor in our house. Check back next week for the “big reveal”!
– Jered


